Using ecflow_ui
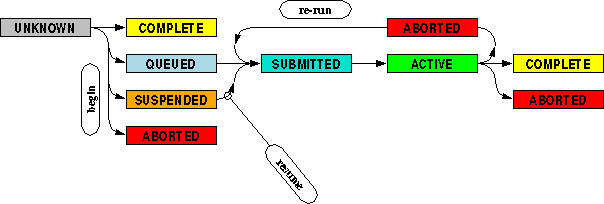
The following diagram shows the typical status changes for a task.
The ecFlowUI provides the GUI for ecFlow, which can be launched using to following command:
ecflow_ui
In order to have an enhanced set of menu options, change the preferences to Administrator mode by performing the following steps:
Open the Tools menu.
Select the Preferences… menu option.
Choose the Menus options on the left-hand side of the dialog.
In the Menu mode tab, select Administrator in the Menu mode drop-down list.
Press the OK button to apply the changes and close the Preferences window.
Once the main ecFlowUI main windows appears, a server can be added by performing the following steps:
Open the Servers menu.
Select the Manage Servers… menu option.
- Select Add server, and enter the details in the ECF server dialog.
- Typical values are:
Name: MyServer
Host: localhost
Port: 3141
Protocol: TCP/IP
Add server to current view: checked
Press the OK button to close the ECF server dialog.
Add a tree view panel by performing the following steps:
Open the Panels menu.
Select the Add tree view panel menu option.
After adding the server, ecFlowUI should display something similar to the following:


The boxes are called nodes, and represent the hierarchy Server > Suite > Family > Task. Nodes can be expanded by clicking on the black triangle on the left-side of the node.
Note
S - stands for the suite, F stands for Family, and T - stands for Task
After expanding the nodes, ecflow_ui should display something similar to the following:

Add an info view pannel by performing the following steps:
Open the Panels menu.
Select the Add info view panel menu option.
n.b. The panels can be moved around by dragging their title bar.
The info panel displays detailed information about the selected node. For example, selecting a task node will display the task ecf script, job file and the job output.
Selecting the node related to t1, and then the Script tab in the info panel should display the ecf script as follows:
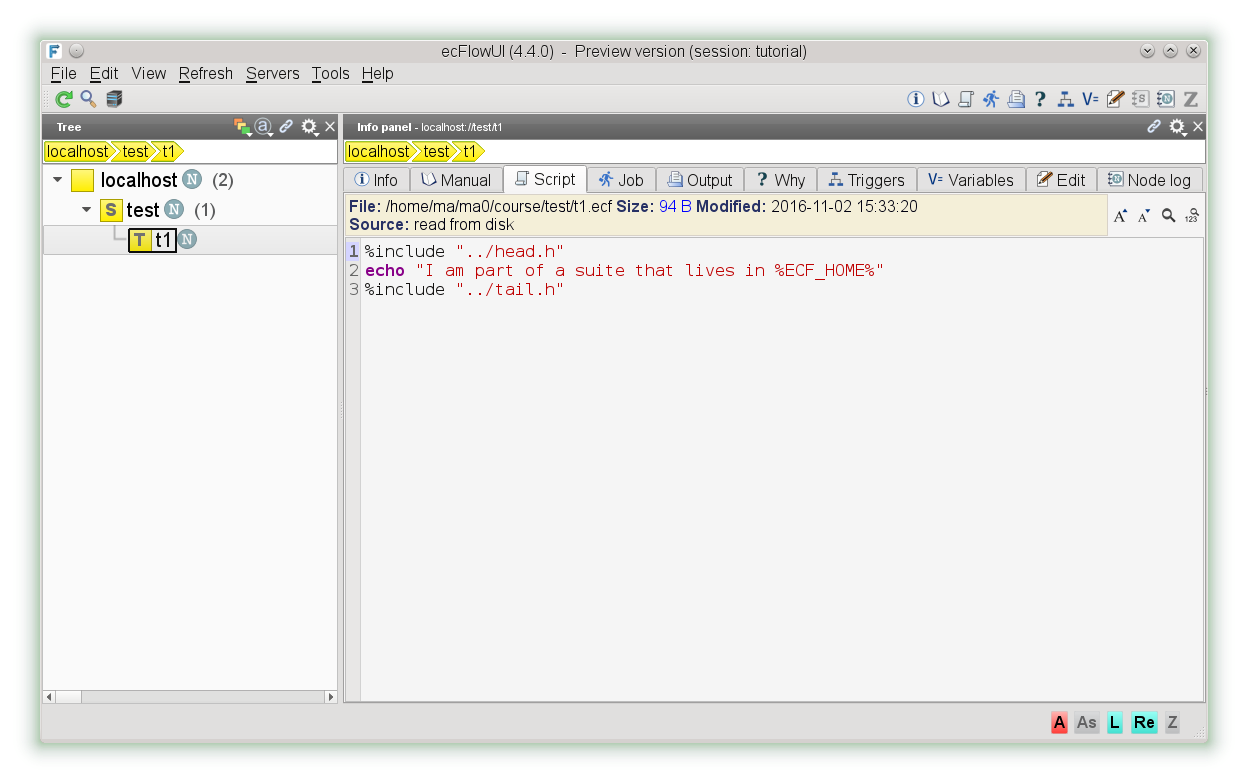
The job file and job output are available on the Job and Output tabs, respectively.
The tree view panel allows access to a context menu by clicking with the right mouse button on a node, which provides access to a variety of options, including:
opening a particular task output in a separate window, via the select the Output… menu option.
rerunning a task, family or suite, via the select the Requeue menu option.
During the execution of the suite, the nodes change colour to reflect the status of the nodes.
There can be a long period between the job changing status and that change being reflected in the ecflow_ui (the default update period for UI is set to 60 seconds). To update the current state more quickly in that window, click the Refresh button in the Toolbar (or press F5).

Add a table view pannel by performing the following steps:
Open the Panels menu.
Select the Add table view panel menu option.
Confirm the default options in the Filter dialog box, by pressing Apply.
After adding the table view, ecflow_ui should display something similar to the following:

You will notice that selection in the tree view, selects the corresponding node in the table view.
For reference, the following list indicates the icons that can be displayed in ecFlowUI:

What to do
Explore ecFlowUI, including adding the tree view, info view and table view panels.
Inspect the ecf script using the info panel.
Requeue the task multiple times, and inspect the output using the info panel.
(Optional) Since there can be a long delay (up to 60s) between the job changing status and the change being reflected in the ecFlowUI window, update the current task to change state more or less quickly.
(Optional) Explore the Preferences dialog, specifically changing the Server settings > Refresh tab > Server refresh period option to configure ecFlowUI to update the state every second.